My Take on a Tee Shirt Quilt - Part One
Quilting. I have done it before, learning a bit more each one, always using what I have found or saved.
My first quilt, from vintage fabric found in my mothers basement, for my wonderful In-Laws. The second was for my flannel shirt loving hubby while we were in cold Western New York. The third for my little girl (not so little by the time I made it) made with her favorite clothes and fabrics through her childhood years - the Stages of My Little Girl.
And, I am at it again. This one is for my youngest, tee shirt only wearing son.
 |
| Choosing |
 |
| Choosing and Editing. "These can come out" |
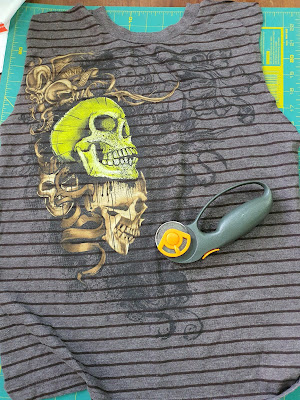
I did ask his preferences, and he took out ones he didn't want in. I added some I found that would have some meaning to him. Then began the cutting.
I didn't want to make the typical Tee Shirt quilt. Search that, and you get a bunch of chaotic examples, some just looking already worn and tired. I was also looking for something other than grid style, squares so precise. I have done that, thanks. A little something different would be good. Plus, if you saw my other 3 quilts (here, here, and here if you missed them above) you know my style is Tied Quilts, so no fancy stitching just old fashioned ties holding the memories together. (My grandmother made tied quilts and they were awesome!)
Also, my youngest son is not a fan of chaos. He agreed with me that space between the shirts was going to look better. This meant the shirts had to have clean lines and straight cuts. Not easy with tees.
I was worried about sewing the stretchy tees. Hard to cut, hard to sew. Interfacing seemed like a pain. (Yes, I am for finding the easy way out). My solution was getting a sheet to sew them to for stability, and heck, just sew them right on top with raw edges for a cool look. I even thought fraying the edges might look cool. But wasn't sure, so I did a quick test in between my cuttings.
It could have a cool look, but this did not seem to fit the clean simple look I was going for. Nah, this would have to go on another project.
Now, it truly was about placement more than anything.
 |
| First Draft |
 |
| Draft 2 |
Next draft was better, cleaner looking. But still not quite right. Straighten?
 |
| Draft 3 |
Yes, we are getting there.
 |
| Final Draft! |
Another couple layouts and finally, we have one I think will be good. I love that there is a pocket from a shirt in there (see small palm trees in the middle - that is a pocket from a shirt), and I planned on making another pocket with the cross from his all-time-favorite shirt. (see bottom left). Yes, this layout felt good, even after sleeping on it a night.
I have enjoyed the placement. It was challenging, a bit tedious, but satisfying. I also loved the critiques that got me to this final layout. Next is the pinning. That should take another day or so. Tedious in a less enjoyable way, but oh so important. It involves measuring and pinning, measuring and pinning, repeat, repeat, repeat. Maybe a day or so is a bit optimistic.
Part Two will tell that part of the story, and the grand finish. Well, I hope a grand finish. As this is an untried method with untried fabrics, we will see.


This quilt has more variety in shirt shape and size
ReplyDeleteIt looks cool makes it look like a collage of the ages